
Deploy Wagtail Blog to AWS Serverless Lambda by using Zappa
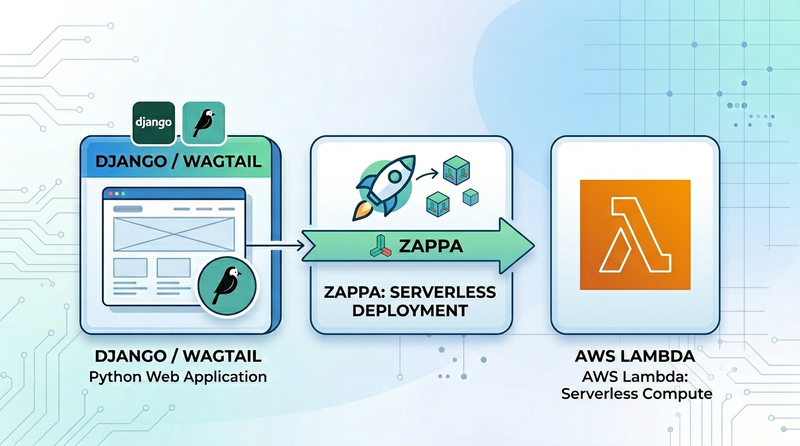
Running a blog doesn't have to mean maintaining a server 24/7 -- especially when the traffic is low or unpredictable. In this tutorial, we'll show you how to deploy a Wagtail blog to AWS Lambda using Zappa - a tool that packages and deploys Django/WSGI applications as serverless functions with minimal configuration. With this serverless setup, AWS manages the underlying infrastructure for you: your application can scale automatically, you only pay for the resources used when requests are processed, and there are no servers to patch, monitor, or maintain. We'll go through the complete deployment process step by step. By the end of this tutorial you will have a fully functional Wagtail blog running on AWS Lambda, backed by an external PostgreSQL database and Amazon S3 for media file storage.
What is AWS Lambda?
AWS Lambda is an event-driven, serverless computing service that lets you run code without provisioning or managing servers. You upload your application code, and the service automatically manages everything required to run, scale, and monitor it with high availability. You pay only for the compute time you consume.
Understanding the Architecture
Before jumping into the deployment, let's look into the architecture of this type of application and learn how Django/Wagtail, a framework designed around long-running server processes, actually works inside AWS Lambda.

AWS Lambda runs the code inside a short-lived, isolated execution environment, executes the request, and tears it down when idle. Zappa bridges this gap by packaging your entire Wagtail project and its dependencies into a ZIP file, uploading it to Lambda, and installing a thin WSGI translation layer that converts API Gateway events into standard Django requests. From Django's perspective, it is simply receiving HTTP requests as normal — views, middleware, the ORM, and the Wagtail admin all work without modification.
Two things must be handled differently from a traditional deployment:
- Media files — the Lambda filesystem is ephemeral and read-only, so uploaded images and documents are stored in Amazon S3 via django-storages instead of on disk.
- Database — unlike a traditional server with a fixed worker pool, Lambda can scale to hundreds of concurrent execution environments at once, each opening its own connection to PostgreSQL.
When API Gateway receives the HTTP request and triggers the Lambda function. Django handles routing and business logic, queries database for page content, and reads or writes media files on S3. The response travels back through API Gateway to the browser. There are no servers for you to manage at any point in this chain.
Prerequisites
This tutorial assumes you are familiar with AWS, IAM, and the AWS CLI. See the AWS CLI documentation if needed.
You will need the following before starting:
- Python3.12+ and uv - a fast Python package and project manager
- PostgreSQL running on port 5432 - local one for dev, remote one for deployment.
- AWS Account with CLI configured, and IAM permissions covering Lambda, API Gateway, S3, and Cloudformation.
Setting Up AWS Infrastructure
Zappa handles the AWS Lambda deployment process and automatically configures the required AWS resources, including API Gateway and the deployment package storage. However, your application media storage bucket is a separate setup. For a Django/Wagtail app using django-storages, we will need to create and configure our own S3 bucket for uploaded media files outside the Lambda environment.
The following command shows how to create S3 bucket for media file storage by using AWS CLI:
# For local development
$ aws s3 mb s3://my-wagtail-blog-media-local --region us-west-1

# For production deployment
$ aws s3 mb s3://my-wagtail-blog-media-prod --region us-west-1We use my-wagtail-blog-media-local and my-wagtail-blog-media-prod as the bucket names in this tutorial. Replace them with your own unique bucket names. Also, make sure to use the AWS region where you want to create your resources.
Running the Blog Locally
Before the Zappa deployment, please setup the project and test it on your local machine, making sure everything works correctly.
Create Local Database
$ bash scripts/create_local_database.shIn this tutorial, the database created is myblogdb, the user/role is myblogrole, and the db password is mypass123. You may update the code and create different ones on your local.
Setup Local Environment
Clone this GitHub repository and install dependencies:
# Clone the repository
$ git clone https://github.com/pydeployer/aws-lambda-serverless-zappa-wagtail-blog.git

# Create Python virtual env
cd aws-lambda-serverless-zappa-wagtail-blog
uv sync

# Activate this env
source .venv/bin/activate
Copy the example environment file and fill in your local PostgreSQL credentials:
$ cp .env.example .env# Django
DJANGO_SECRET_KEY=<your_django_secret_key>
DJANGO_SETTINGS_MODULE=app.settings.local
# DB
POSTGRES_HOST=127.0.0.1
POSTGRES_PORT=5432
POSTGRES_DATABASE=myblogdb
POSTGRES_USERNAME=myblogrole
POSTGRES_PASSWORD=mypass123
# AWS
AWS_DEFAULT_REGION=us-west-1
AWS_S3_BUCKET_NAME=my-wagtail-blog-media-localRun Django Server
After the database and environment setup, then we can run the Django server on the local machine with the entrypoint command:
$ bash entrypoint.shThe entrypoint.sh applies migrations, seeds 30 sample blog posts, and starts the development server. Then go to visit http://127.0.0.1:8000, you can see the home page of this Wagtail blog:
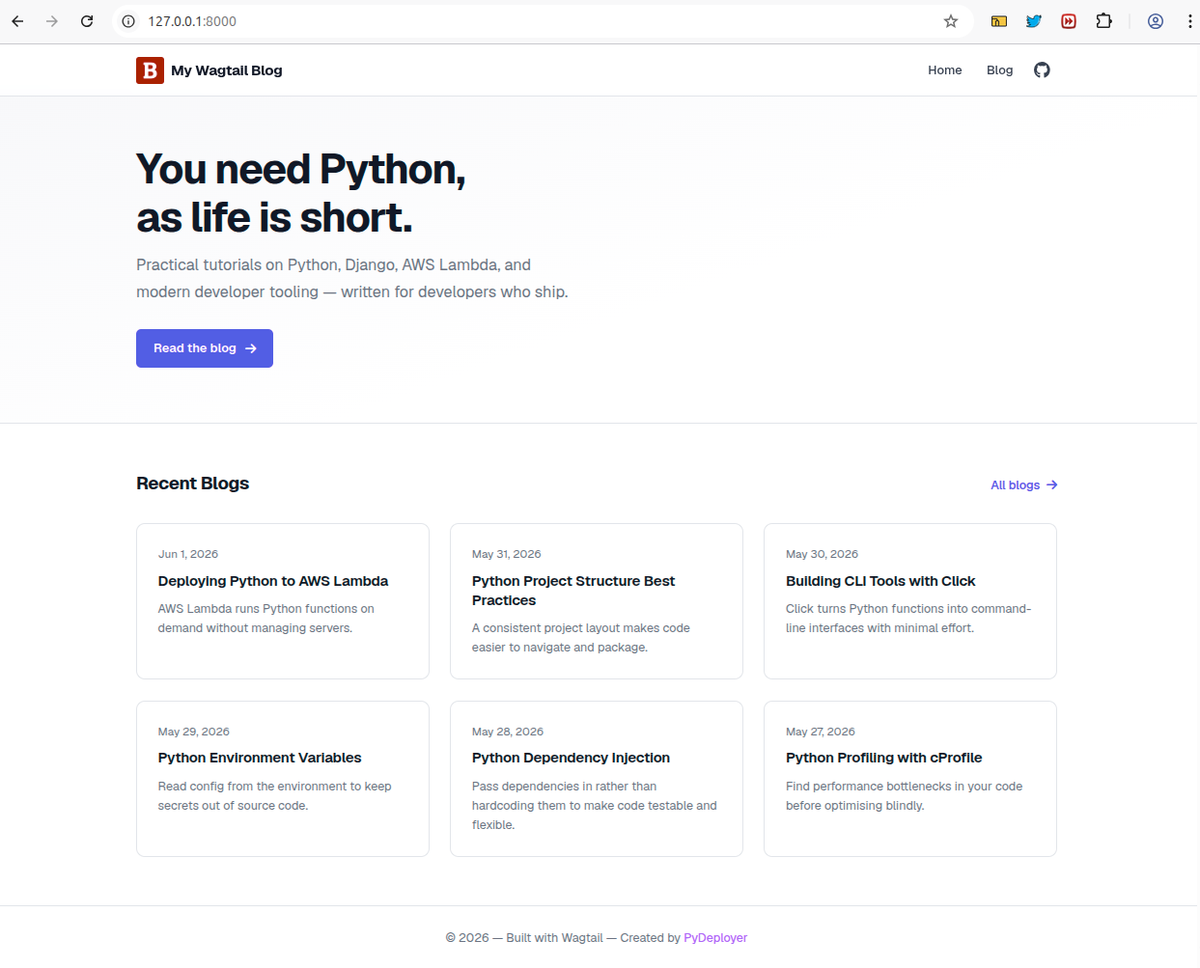
For detailed local setup steps, please refer to the repo's README. If any issue, please feel free to reach out.
Configuring Production Settings
The app/settings/prod.py is the production settings module. It inherits shared configuration from base.py and overrides anything environment-specific. Some settings that needs to highlight are listed below:
# app/settings/prod.py
import environ
from .base import *

env = environ.Env()

DEBUG = False

SECRET_KEY = env("DJANGO_SECRET_KEY")

ALLOWED_HOSTS = [
    env("LAMBDA_HOST", default=""),  # API Gateway / custom domain
    ".execute-api.amazonaws.com",
]


# Database - PostgreSQL
DATABASES = {
    'default': {
        'ENGINE': 'django.db.backends.postgresql',
        'HOST': env.str('POSTGRES_HOST'),
        'PORT': env.str('POSTGRES_PORT'),
        'USER': env.str('POSTGRES_USERNAME'),
        'PASSWORD': env.str('POSTGRES_PASSWORD'),
        'NAME': env.str('POSTGRES_DATABASE'),
        'ATOMIC_REQUESTS': True,
        'CONN_MAX_AGE': env.int('DB_CONN_MAX_AGE', default=60)
    }
}


# Storages for media files
STORAGES = {
    "default": {
        "BACKEND": "storages.backends.s3.S3Storage",
        "OPTIONS": {
            "region_name": env.str('AWS_DEFAULT_REGION', 'us-west-1'),
            "bucket_name": env.str('AWS_S3_BUCKET_NAME'),
        },
    },
    "staticfiles": {
        "BACKEND": "whitenoise.storage.CompressedManifestStaticFilesStorage",
    },
}

# Static files — collected locally, served in Lambda
STATIC_ROOT = ROOT_DIR / 'staticfiles'
STATIC_URL = f"/{ZAPPA_STAGE}/static/"

# Request settings
ATOMIC_REQUESTS = True
Django Secret Key
The Django secret key is used for cryptographic signing — sessions, CSRF tokens, password reset links, and more. It must be unique, unpredictable, and never shared or committed to version control.
Generate a Django secret key for the production deployment.
$ python -c "from django.core.management.utils import get_random_secret_key; print(get_random_secret_key())"PostgreSQL Database
This section contains referral link. If you find it useful and sign up for paid plan, I may earn a small commission - at no extra cost to you. Thanks for the support!
A production PostgreSQL database is required for this deployment. You may use AWS RDS, a third-party managed database service, or a self-hosted PostgreSQL instance. Database provisioning is out of scope for this tutorial -- any PostgreSQL host with a reachable connection string will work.
In this tutorial, I am using Neon (referral link) for the production database. It's a serverless PostgreSQL service that takes just minutes to set up — no infrastructure to manage. Once your Neon database is created, grab the database host, port and credentials from the dashboard - we'll need them in the next section to create zappa_settings.json.
Media Storage
We will use the Amazon S3 bucket created above - my-wagtail-blog-media-prod to configure AWS_S3_BUCKET_NAME.
Other Settings
The settings above are the minimum required to get the deployment running. For a production-hardened setup, you'll also want to configure allowed hosts, CORS origins, session and cookie security, HTTPS enforcement, and logging. Refer to the Django settings reference and Wagtail settings reference for the full list.
Installing and Configuring Zappa
Zappa is listed as a development dependency in pyproject.toml. It only runs locally to deploy the web application, and does not need to be bundled inside the Lambda package itself.
Make sure your virtual environment is activated, then run the command below to install zappa,
$ uv add zappa --dev[dependency-groups]
dev = [
"zappa>=0.62.1",
]Then generate a zappa_settings.json interactively:
$ zappa initZappa will ask a series of questions. You can answer them or exit and create the file manually. A production-ready configuration looks like this:
{
  "production": {
    "django_settings": "app.settings.prod",
    "project_name": "my-zappa-wagtail-blog",
    "runtime": "python3.13",
    "s3_bucket": "my-zappa-wagtail-blog-deployment-bucket",
    "aws_region": "us-west-1",
    "environment_variables": {
      "DJANGO_SECRET_KEY": "<custom-value>",
      "DJANGO_SETTINGS_MODULE": "app.settings.prod",
      "POSTGRES_HOST": "<custom-value>",
      "POSTGRES_PORT": "<custom-value>",
      "POSTGRES_DATABASE": "<custom-value>",
      "POSTGRES_USERNAME": "<custom-value>",
      "POSTGRES_PASSWORD": "<custom-value>",
      "AWS_DEFAULT_REGION": "us-west-1",
      "AWS_S3_BUCKET_NAME": "my-wagtail-blog-media-prod",
      "DJANGO_SUPERUSER_PASSWORD": "admin12345"
    },
    "timeout_seconds": 300,
    "memory_size": 512,
    "use_precompiled_packages": true,
    "slim_handler": true,
    "exclude": [
      "*.pyc",
      ".git",
      ".env",
      "node_modules",
      "__pycache__"
    ]
  }
}Please add zappa_settings.json to the .gitignore file and ensure it is not committed to the repository, as it contains sensitive credentials.
A few things to call out:
s3_bucketis a bucket Zappa uses for storing deployment packages (separate from your media bucket). Zappa will create it if it doesn't exist.use_precompiled_packagestells Zappa to use pre-compiled binary wheels for packages likepsycopgthat include native extensions. This is important because Lambda runs on Amazon Linux, not your local OS.timeout_secondsshould be long enough for cold-start Wagtail migrations & requests.
Once zappa_settings.json is configured and ready, the next step is to deploy the application by running the zappa deploy command.
Deploying to AWS Lambda
With your settings and Zappa configuration in place, deployment is a single command.
First Deployment
$ zappa deploy production
...
Deploying API Gateway..
Deployment complete!
Your API Gateway URL is: https://wqngy51vl8.execute-api.us-west-1.amazonaws.com/productionThe output of API Gateway URL would be different for your deployment.
Zappa will:
- Package your project and all dependencies into a ZIP file
- Upload the package to the Zappa S3 deployment bucket
- Create a Lambda function using the package
- Create an API Gateway REST API and connect it to the Lambda function
- Print the API Gateway URL when done
The first deployment typically takes 2–4 minutes.
Your PostgreSQL database is empty at this point. If visiting the endpoint https://wqngy51vl8.execute-api.us-west-1.amazonaws.com/production. it'll return Bad Request (400).
Database Migrations
Run database migrations through Zappa's remote execution to create Wagtail and blog db tables,
$ zappa manage production migrate
...
Applying wagtailusers.0013_userprofile_density... OK
Applying wagtailusers.0014_userprofile_contrast... OK
Applying wagtailusers.0015_userprofile_keyboard_shortcuts... OK
[END] RequestId: 95c9729c-2b54-45e2-b3be-099d8f387856
[REPORT] RequestId: 95c9729c-2b54-45e2-b3be-099d8f387856
Duration: 28379.40 ms
Billed Duration: 28380 ms
Memory Size: 512 MB
Max Memory Used: 210 MB
This invokes python manage.py migrate inside a Lambda execution context, connecting to the database host configured, and execute db migrations.
Collect static files
Static files (CSS, JavaScript, images) are served directly from Lambda using WhiteNoise, where there is a middleware in settings directly after SecurityMiddleware:
MIDDLEWARE = [
    "django.middleware.security.SecurityMiddleware",
    "whitenoise.middleware.WhiteNoiseMiddleware",
    ...
]
Configure static file in the prod.py settings:
STATIC_ROOT = ROOT_DIR / 'staticfiles'
STATIC_URL = "/static/"
STORAGES = {
    ...
    "staticfiles": {
        "BACKEND": "whitenoise.storage.CompressedManifestStaticFilesStorage",
    },
}
Run collectstatic locally before deploying:
$ python manage.py collectstatic --noinputAfter the change, update the deployed Lambda function:
$ zappa update production
...
INFO:Deploying API Gateway..
Scheduling..
INFO:Unscheduled 11c03cdbd7ad814d08047-zappa-keep-warm-handler.keep_warm_callback.
INFO:Scheduled 11c03cdbd7ad814d08047-zappa-keep-warm-handler.keep_warm_callback with expression rate(4 minutes)!
INFO:Waiting for lambda function [my-zappa-wagtail-blog-production] to be updated...
Your updated Zappa deployment is live!: https://wqngy51vl8.execute-api.us-west-1.amazonaws.com/production
After that your can visit the endpoint to check the API Gateway url, and the page should show: "Welcome to your new Wagtail site!"
Create Wagtail Superuser
Since we cannot create a superuser using the standard Django management command workflow in a Lambda environment, we need to run the command without TTY support. To handle this, make sure DJANGO_SUPERUSER_PASSWORD is configured in zappa_settings.json. Then, run the command below to create the superuser.
$ zappa manage production "createsuperuser --username admin --email [email protected]"$ zappa manage production "createsuperuser --username admin --email [email protected] --noinput"
[START] RequestId: 0a18086c-5b35-442c-963b-284d93952157 Version: $LATEST
[DEBUG] 2026-06-20T04:07:40.777Z 0a18086c-5b35-442c-963b-284d93952157 Zappa Event: {'manage': 'createsuperuser --username admin --email [email protected] --noinput'}
Superuser created successfully.
[END] RequestId: 0a18086c-5b35-442c-963b-284d93952157
[REPORT] RequestId: 0a18086c-5b35-442c-963b-284d93952157
Duration: 2443.60 ms
Billed Duration: 2444 ms
Memory Size: 512 MB
Max Memory Used: 498 MBRun Custom Command
There is a custom Django command to create sample blogs:
$ zappa manage production "setup_site --include-blogs"$ zappa manage production "setup_site --include-blogs"
...
Done — 31 sample blogs created.
[END] RequestId: ea2fb391-466b-4b56-8ed5-37ffc261cbc9
[REPORT] RequestId: ea2fb391-466b-4b56-8ed5-37ffc261cbc9
Duration: 28907.45 ms
Billed Duration: 28908 ms
Memory Size: 512 MB
Max Memory Used: 474 MBAt this point, the Wagtail blog works correctly — the blog is live.
Login to Wagtail Admin
Navigate to your API Gateway URL with /admin/ appended. Sign in with the superuser credentials you just created. After that, you are good to manage your blog pages on Wagtail admin panel.
Managing the Deployment
Deploy Code Changes
After modifying models, templates, or settings locally, update the Lambda function:
$ zappa update productionIf you've added a migration:
$ zappa update production
$ zappa manage production migrate
View the Logs
Lambda logs stream to CloudWatch. Zappa gives you a convenient tail command:
$ zappa tail productionAdd --since 1h to limit output, or --filter "ERROR" to show only errors.
Roll Back a Deployment
Zappa keeps previous deployment packages in S3. To roll back:
$ zappa rollback production -n 1Undeploy the Blog
To remove all Lambda, API Gateway, and IAM resources Zappa created:
$ zappa undeploy production
Calling undeploy for stage production..
Are you sure you want to undeploy? [y/n] y
INFO:Deleting API Gateway..
INFO:Waiting for stack my-zappa-wagtail-blog-production to be deleted..
Unscheduling..
INFO:Unscheduled 11c03cdbd7ad814d08047-zappa-keep-warm-handler.keep_warm_callback.
INFO:Deleting Lambda function..
Done!
This does not delete your db instance or S3 buckets with media files — only Zappa-managed resources.
If the demo site https://wqngy51vl8.execute-api.us-west-1.amazonaws.com/production is no longer accessible, that means the demo site has been undeployed upon completion of this tutorial.
Final Notes & Source Code
Gotchas and Tips
Static files not loading — if CSS or JavaScript returns 404, double check that STATIC_URL in prod.py matches where WhiteNoise or S3 is actually serving the files from.
Database connection limits — Lambda can open many concurrent connections under load. If you hit connection limit errors, place a connection pooler such as PgBouncer or your database provider's built-in proxy in front of PostgreSQL.
Deployment package size — Lambda limits packages to 50 MB zipped and 250 MB unzipped. The standard Wagtail stack fits comfortably within this, but if you hit the limit, enable slim_handler in zappa_settings.json to reduce package size.
/tmp is the only writable directory — Lambda provides 512 MB of writable space at /tmp, but files there do not persist between invocations. Use it only for temporary files within a single request.
ATOMIC_REQUESTS = True — wraps every HTTP request in a database transaction, which is good for data integrity. Be aware that long-running requests will hold a transaction open for their full duration.
Pros & Cons
Pros
- No server management — AWS handles all infrastructure, scaling, and availability automatically
- Cost effective — you pay only for actual requests, making it ideal for low-to-medium traffic blogs
- Auto scaling — Lambda scales instantly under traffic spikes without any configuration
- Zero idle cost — unlike a VPS or EC2 instance, you are not billed when the blog receives no traffic
Cons
- Cold starts — the first request after a period of inactivity takes longer while Lambda initialises the execution environment
- Stateless — no persistent filesystem means media uploads must go to S3 and sessions must be stored in the database or cache
- Database connections — Lambda can open many concurrent connections to the database under load, requiring a Postgres proxy or connection pooler at scale
- Deployment complexity — compared to a traditional server, the serverless setup involves more moving parts (API Gateway, IAM roles, S3, Secrets Manager)
- Not ideal for heavy workloads — long-running tasks such as image processing or report generation
Summary
In this tutorial you've taken a Wagtail CMS blog project from a local development setup through a full serverless deployment on AWS Lambda. Here's what each piece of the stack does:
- Wagtail provides the content management system — a polished Django-based CMS with a tree-structured page model, a StreamField block editor, and a fully featured admin interface.
- Django + Zappa handle the server-side logic. Zappa wraps Django's WSGI application and manages the entire Lambda lifecycle — packaging, deploying, updating, and rolling back.
- Neon (referral link) PostgreSQL serves as the persistent relational database, accessible from AWS Lambda.
- Amazon S3 + django-storages take care of media files. Every image or document uploaded through the Wagtail admin is stored in S3 and served directly from there.
- API Gateway acts as the HTTP front door, routing incoming requests to the Lambda function.
The result is a fully managed, automatically scaling blog that costs virtually nothing at low traffic levels — you're billed only for the compute time your Lambda function actually uses. As your blog grows, the same architecture scales horizontally without any changes on your part.
Source Code
The full source code, including all settings, models, templates, and scripts from this tutorial, is at https://github.com/pydeployer/aws-lambda-serverless-zappa-wagtail-blog. If any issue or question, please feel free to reach out.